Tag Archives: erin brooke

Jewelry Blog: Help! My Sterling Silver is Turning Black, Grey, White!

I recently had a customer complain about a necklace “tarnishing” just a few weeks after purchase. His wife decided to use the polishing cloth to give the sterling silver a wipe, and was aghast when it came away black.  Now, the necklace itself was not tarnished, and by that I mean it hadn’t turned that yellow-grey-black that we typically see.

A well-used silver polishing cloth.

So he wrote me to express his surprise that his new necklace would discolour so quickly.  I realized it’s probably a great education opportunity.

When silver tarnishes, it’s a surface discolouration  caused by the interaction of oxygen (air) with the silver, and it’s also known as oxidization. With sterling silver this process is normal, natural, expected, and yes, it can occur relatively quickly.

Many things can speed tarnish; air pollution, the minerals in your water (and as such wearing your silver jewelry in the shower can speed this process too), living or working near a chemical, electric or manufacturing plant are all things that can cause discolouration more quickly.

Recent studies have shown tarnish develops microscopically within hours of being cleaned and exposed to air again.  You may not see it on the piece for several days or weeks, but it’s there, and will show up as a black residue on a polishing cloth.  A great way to keep seldom worn jewelry clean (and silverware if you have it), is to store sterling silver in a ziplock bag with all the air squeezed or rolled out of it.  You can wrap it in a soft cloth first too.  Oxygen and thus tarnish may still seep in and can still cause blackening especially if the pieces are stores for long periods of time, but it should keep things to a minimum.

Chemically tarnished rings.  Oops!
Chemically tarnished rings. Oops!

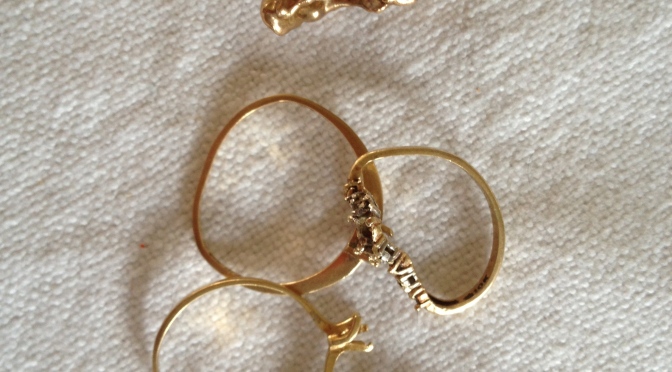
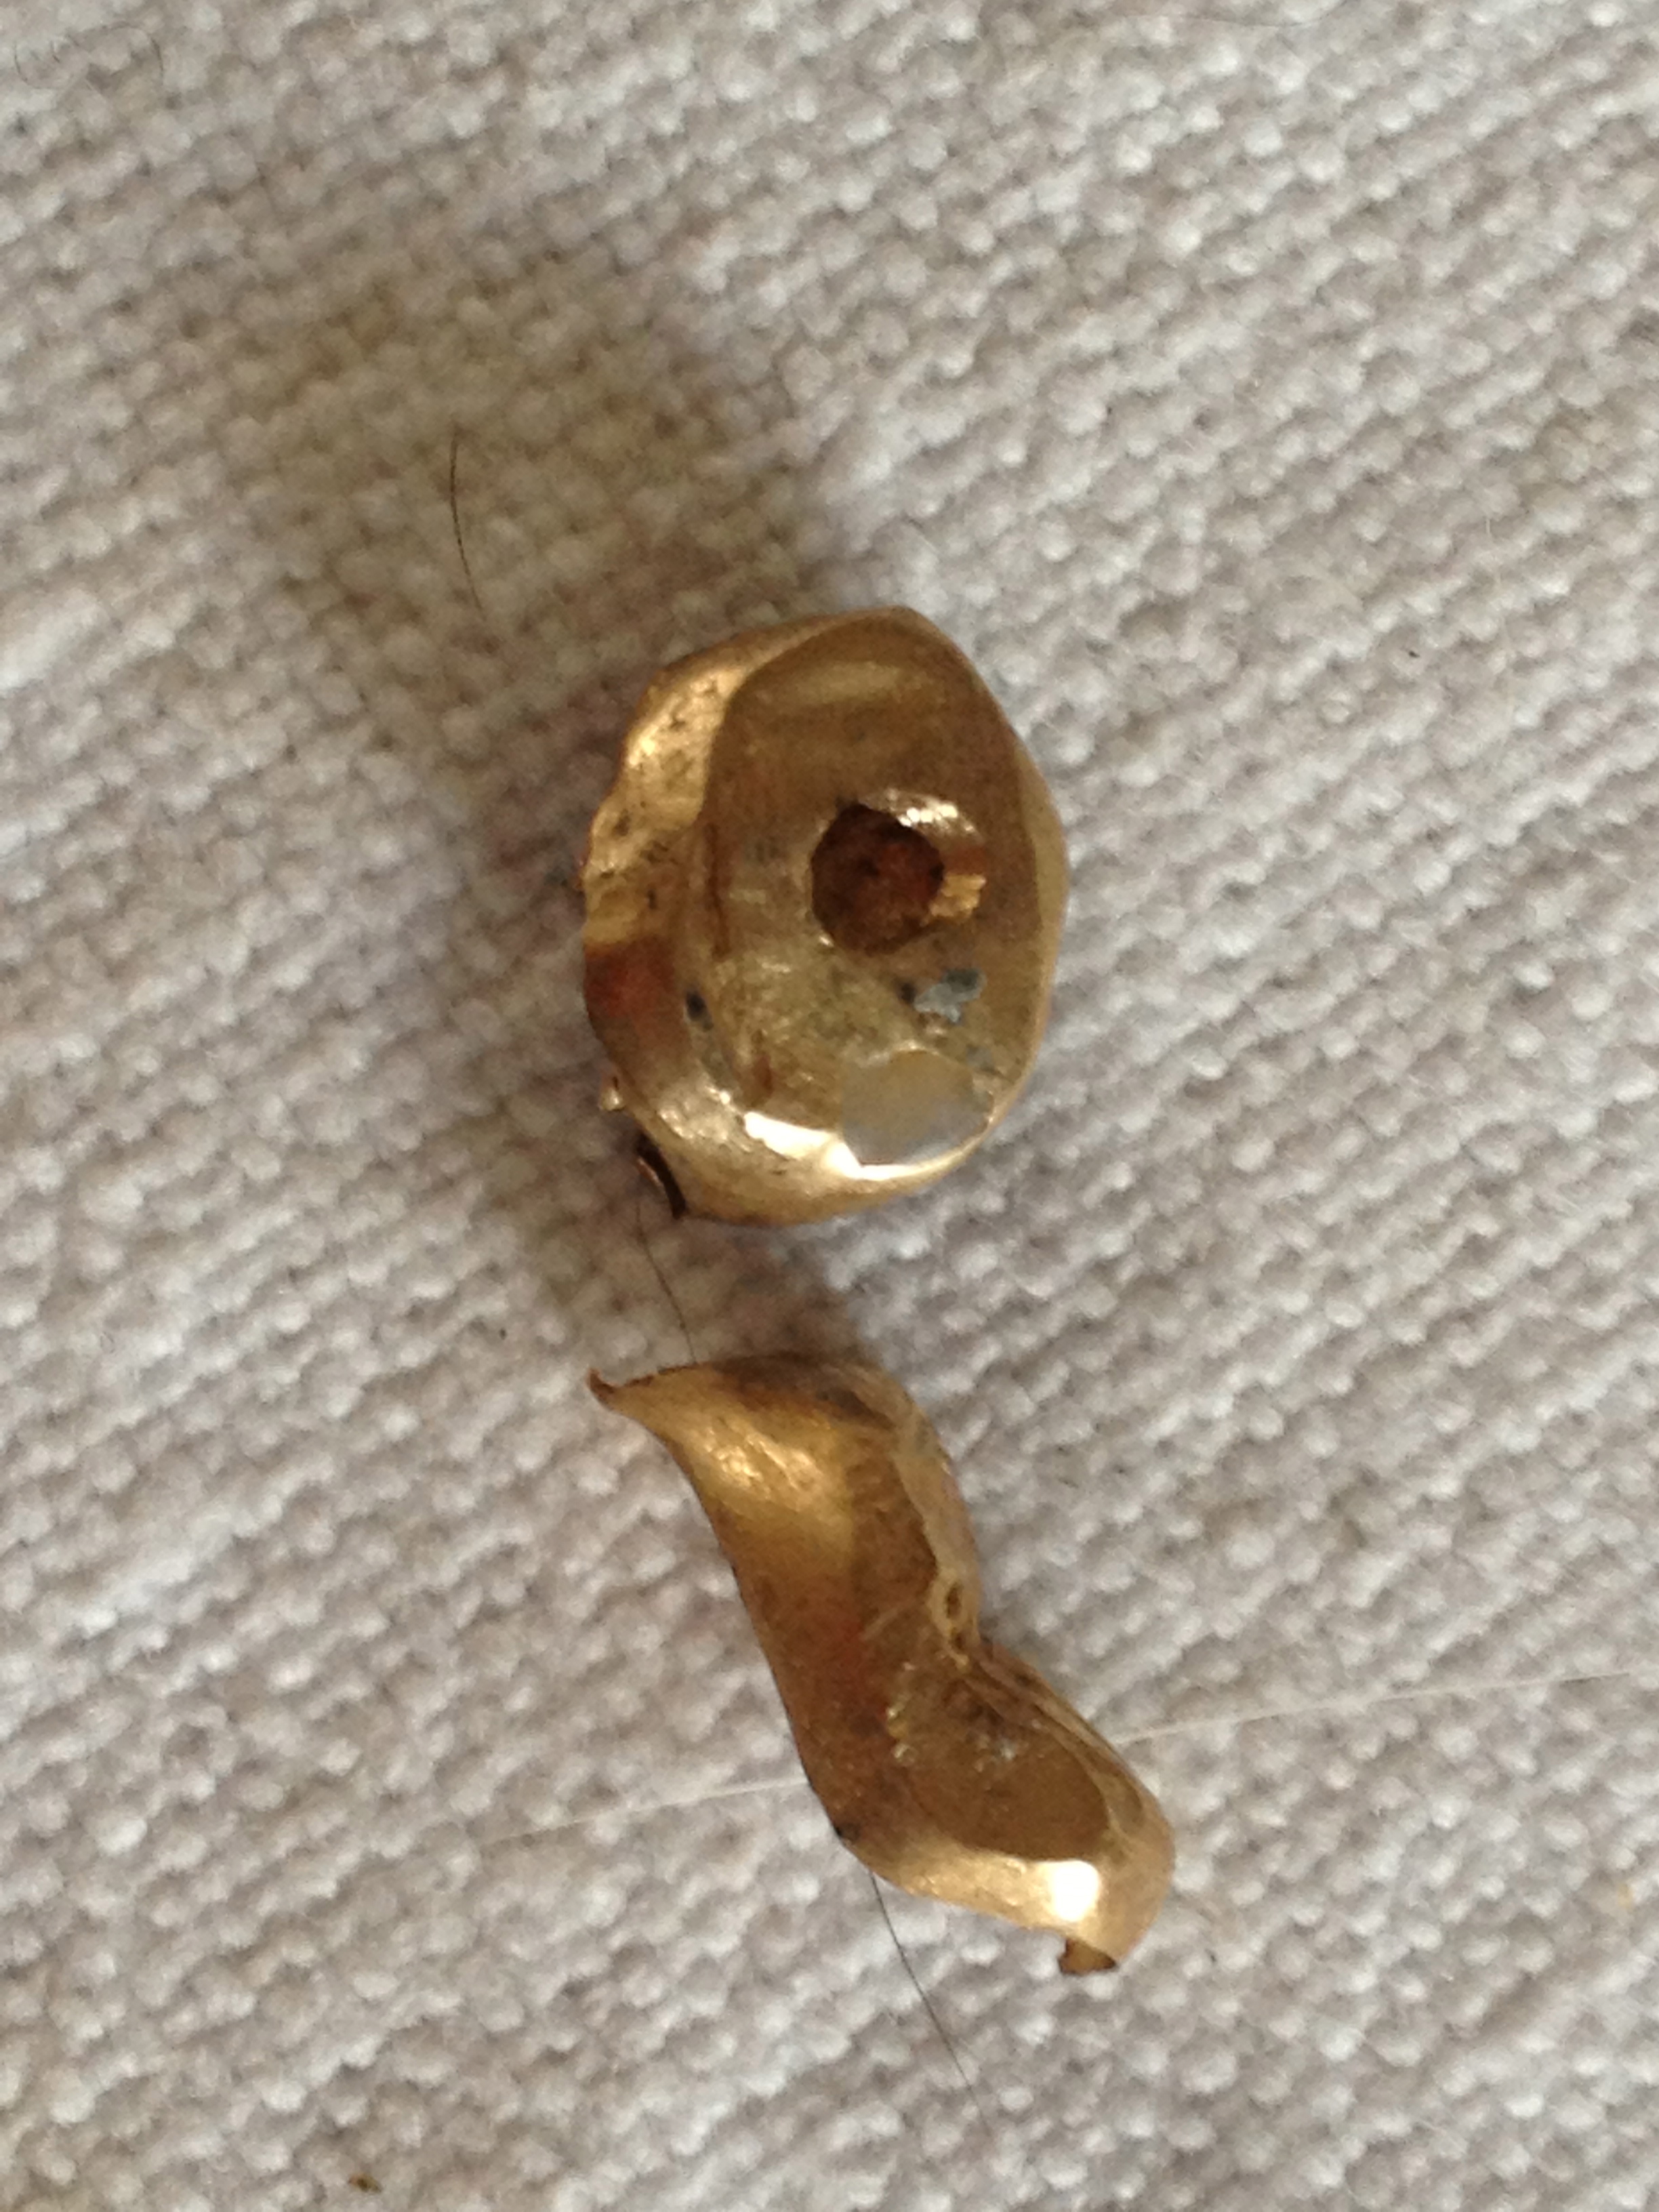
Coincidentally at the same time as this customer contacted me,  I had a friend show me some rings I’d made for her.  The shiny sterling silver had turned a deep, dark black.  This was no tarnish effect, and she admitted she’d immersed her baubles in some household cleaner (Lysol) to spruce them up.  Instead, they’d become instantly and deeply chemically oxidized.

Now, she actually liked this look and referred to it as ‘edgy’, so she’s leaving them as they are for now.  If she did want them restored it should be a relatively simple process of buffing the chemical scarring off the surface layer, and exposing clean shiny silver beneath,  But this also serves as a leaning moment; only soap and water, silver polish or a silver polishing cloth should be used to clean silver.  Many household cleaners and chemicals can alter your precious silver.  In fact, I once had a ring turn bronze after accidentally spritzing window cleaner on it, and had other silver turn grey by getting baking soda onto it.  That too buffed out, but you’ll want to be careful with your jewelry.  If you do find some discolouration of your silver, you can try to get it off with a silver cloth (brand names include Sunshine Cloth, available at most any jeweler). If it won’t work, stop while you’re ahead and take it to a pro for professional help.

Fresh new polishing cloths.

And for the jewelry ‘geeks’, the Government of Canada has written a helpful article about how to best care for your silver.  Read it here.

Have you got a horror story – or a home remedy for tarnish?  Post your comments below!

It’s DONE! Making My Brother’s Wedding Rings 6: The Finishing

This is where the rubber meets the road in the jewelry-making process. Finishing can make or break a piece.

With casting, if care is taken with the wax (ie. making sure the wax if very smooth, free of nicks and scratches, and nice and even) then your finished piece will be that much easier to clean up.

I’m going to be very meticulous with the finishing here, because I really want these rings to be beautiful and shiny. They are, after all, wedding rings, and need to be extra special anyway!

Check out our starting point:

Gold rings direct from the casting flask and ready to polish.

First step in finishing; filing off the remnants of the sprues. We’re left with hearty balls on the band after the casting; and its no easy task to file that down with hand tools to make the bands smooth and even again. The goal is to make sure one would never know it was there. That takes some time, and some elbow grease.

I save my gold filings for use in future projects. It may seem like overkill to keep gold powder/dust, but it adds up for future use.

Bubble left on the band from the sprue.

Once the band is even again it gets a nice light sanding. I used a Foredom tool with a coarse then a fine sanding drum to make the work easier. It cleaned up it very nicely.

Once the sanding is complete; it’s over to the polishing wheel for a liberal coating of Tripoli compound; a waxy paste that is mildly abrasive. It can quickly and easily remove the fine marks the sanding has left, and is the first of the polishing steps to ensure a mirror finish.

Tripoli compound being loaded into the polishing wheel.

After the tripoli does its work, the rings get a quick scrub in soap and water, and then on to the second phase of polishing compound; Red Rouge. This is where the rings buff up like a dream. A few minutes under the rouge wheel and they shine.

IMG_5601

IMG_5604

Another quick scrub up, and….. they’re done.

It’s been months of slow work (I had the privilege of being able to take my time with these) but I’m VERY happy with how they turned out. This work could be done in just a couple of days, but it was also a learning process for me I had no desire to rush. It also helped that my brother asked me to do these last fall.

The wedding is July 27th. I hope you’ll join me in wishing the newlyweds-to-be a lifetime of happiness … and great looking jewelry.

Shiny!
Shiny!IMG_5605

IMG_5609IMG_5610

Love it! So shiny I can see the pattern of my phone case in the ring!

20130705-133309.jpg

20130705-133319.jpg

20130705-133332.jpg

Making My Brother’s Wedding Rings 5: Casting Part 2

So last night we made the moulds (see Part one of the casting blog for that).   Tonight we’re liquefying gold and turning it into rings.

If we’ve done a good job at the spruing, investment, and kiln drying; this is the fun and easy part.

First steps; prep the equipment.

IMG_5500

We’re using a centrifugal casting set up, which consists of a large drum (to protect you if your flask explodes with hot metal inside), a crucible (where the metal gets melted down), a cradle for your casting flask or your mould, and a spinning arm which gets wound up like a top, and has a brake put on until you’re ready to go.

Heating the crucible

We heat the crucible first, to help lower the time it will take the melt the metal.  Once it’s piping hot, the flask is removed from the kiln, wired into the cradle, and the crucible and flask are pushed together.

IMG_5507
Removing the casting flask from the kiln
IMG_5508
Wiring the hot flask to the arm.

More heat is applied to make sure everything is warm, and the metal will flow freely.

Then it’s time to add the gold (good bye old unworn gold, hello new, shiny wedding rings!).

The collected gold, about to become shiny and new.

It’s all piled in and heated until it’s 100% liquid; Teacher Trevor checks the molten goodness for lumps of unmelted metal, which could not only wreck your pour, but could also cause the flask to explode.  (Thank goodness for that drum!).

FIRE!! (in the crucible)

Once Trevor is satisfied everything is a go, he releases the brake and centrifugal force takes over; sucking the gold deep into the flask so it fills everything.

Brakes OFF; the arm spins around, using centrifugal force to pull the metal in.

The arm spins for a couple minutes, then the flask is left to cool off a bit before quenching it in water.

Gold peeking out the top of the "funnel" part of the casting flask.  Cooling before quenching.
Gold peeking out the top of the “funnel” part of the casting flask. Cooling before quenching.
Quenching the flask in water.

The water begins dissolving the investment almost immediately and it crumbles out of the flask.  We hear a soft ‘plunk’ as the gold rings fall out and hit the bottom of the quench bucket.  Trevor fishes them out and….  Boy, do they look rough still!

Still a bit chalky from the investment...
Still a bit chalky from the investment…
Cleaned up but still not pretty & shiny...

So what’s a sister to do?  Part 6 (and final part): Finishing.

Ready for the FINAL step: finishing.

Making My Brother’s Wedding Rings 4: Casting Part 1

Now the action begins.

Casting is a 2-day process and it starts with prepping the wax rings by attaching sprues; essentially little hoses, which will attach to a wee wax funnel where the molten metal will flow in.

Attaching the sprues with a hot wax pen.

The sprues are attached using a drop of hot wax.

Sprued rings, ready for the flask.

Once that’s done, they’re fitted into the base of the casting flask, and its measured to see how much investment is needed.

IMG_5482

Investment is an almost plaster-like substance, which fills up the flask and covers the wax rings.  It’s then baked in a high heat kiln overnight. The wax rings dissolve, leaving perfect little hollows, shaped exactly like your rings, and with any and all detail.

IMG_5483

Making and mixing your investment is a specialty all to itself.  Trevor, my jewelry instructor of a few years is an expert, and he’s doing the bulk of the work here, and humouring me by letting me “help”. It’s a great learning experience for me; but I’d definitely be in over my head if I had to try this myself.

IMG_5488

The investment power can be toxic, so wearing proper protection is a must.

Meaasuring the investment powder and using distilled water are also essentials.  Trevor is also adamant that the mixing technique is precise; using gloved hands to feel for any lumps (just one could cause your new plaster cast to explode in the kiln, or when pouring the gold), and timing the mixing exactly (we have 9 minutes to mix and pour and vibrate the flasks.

Hand-mixing the investment.

Vibrating removes any air bubbles inside which could cause similar unhappy endings to a casting flask, and thus all your hard work.

Vibrating the investment to remove air bubbles.

Once the mixture is just right, it’s carefully poured into the flasks and left to dry for a few hours.  After that it’s straight to the kiln.

photo 3 photo 4

Finished flask from the top.
Finished flask from the top. That little “scoop” is the funnel that we’ll pour the molten gold into.

Once the flasks have been fired for the appropriate time, they’re ready for the next step; melting down the gold and pouring!

That’s tomorrow….

One post-script on this:  this is by no means an exact step-by-step of the casting process.  Casting is a very specialized, very delicate and sometimes dangerous process that should only be done by the experienced, or under proper supervision.  This is my journal of the process of making my brother’s rings, so please, don’t read this and try it at home!

All about Zircons. Don’t Go Thinkin’ They’re “Cubic Zirconia”.

Zircon is known since the Middle Ages. The oldest known zircons are from Western Australia, with an age of 4.4 billion years. The name probably comes from the Persian word “zargun” which means “gold-colored,” although zircon comes in a wide range of different colors. The most popular zircon-color is blue.Most blue gemstones come in a pastel blue, but some exceptional gems have a bright blue color. Zircon is also available in green, dark red, violet, yellow, brown, and orange. Due to its high refractive index and strong dispersion, zircon has great brilliance and intensive fire. The luster is vitreous to a brilliant sheen. Although relatively hard (rating 6.5-7.5 on Mohs scale) zircon is brittle and therefore sensitive to knocks and pressure. The gem has the tendency to wear along facet edges. Its use in rings should therefore be limited to protective settings or occasional wear jewelry. Zircon jewelry should be stored carefully.Zircon is a birthstone for those who are born in December.

Zircon Gemstone

Zircon colors
Colorless when pure, the zirconium silicate takes on various shades due to impurities. The most popular zircon-color is blue. Most blue gemstones come in a pastel blue, but some exceptional gems have a bright blue color. Zircon is also available in green, dark red, violet, yellow, brown, and orange.
The brown varieties, mostly found in Southeast Asia, are heat treated in order to produce colorless and blue zircons.
In the gemstone trade some terms refer to different colored zircons:
Hyacinth: yellow, yellow-red to red-brown zircon
Jargon: straw-yellow to almost colorless zircon
Starlight: rich, slightly greenish blue zircon variety, created by heating

Buying Zircon
Zircon is brittle and therefore sensitive to knocks and pressure. The gem has the tendency to wear along facet edges. Its use in rings should therefore be limited to protective settings or occasional wear jewelry. Zircon jewelry should be stored carefully.

Color
Medium dark, pure blue stones have the highest per carat value.

Lighting
Zircon looks best in daylight, more precisely: Just after sunrise and before sunset, when the light is considered to be soft and warm.

Clarity
In general zircon is transparent to translucent. Impurities cause the various color. Zircons with a cat’s eye effect are known but rare. Some crystals contain radioactive thorium and uranium. Over time, the radioactivity breaks down the crystal structure so that such stones (usually green) tend to an amorphous structure, with a lower refractive index and luster than the crystalline type. These slightly radioactive zircons are very rare in the trade, but highly prized by collectors and pose no heath threat to its wearer.

Cut
The high birefringence of zircon makes it necessary for the cutter to orient the table of the stone to the optic axis; otherwise the interior may look fuzzy, due to facet image doubling.

Colorless stones are brilliant cut. They can fraudulently been offered for “matura” diamond. On the other hand, natural zircon can be confused with synthetic cubic zirconia, a common diamond look-alike. Colored stones get a brilliant or step (emerald) cut.

Round stones are often given a “zircon” cut which is similar to a standard round brilliant cut with an extra row of facets at the edges.

Zircon location and deposits
Zircon deposits are mainly alluvial. Zircon is found in Australia, Brazil, Cambodia, Korea, Madagascar, Mozambique, Myanmar, Nigeria, Sri Lanka, Tanzania, Thailand and Vietnam.

Common Zircon treatments
The brown varieties, mostly found in Southeast Asia, are heat treated at temperatures of 800-1000 degrees C (1472-1832 degrees F), in order to produce colorless and blue zircons. These colors aren’t necessarily stable. Ultraviolet rays or sunlight can produce changes.

World-famous Zircon
If one considers fame the difference between average and elite, zircon indeed has some fame of its own. It is one of the densest gemstones, which means that it will look smaller than other varieties of the same weight.

Zircon gemology
Species: Zircon
Color: Colorless, yellow, brown, orange, red violet, blue, green
Chemical composition: ZrSiO4 zirconium silicate
Crystal system: (Tetragonal), short, stocky, four-sided prisms with pyramidal ends
Hardness: 6.5-7.5 (Mohs scale)
Specific gravity: 3.93 – 4.73
Refractive index: 1.810 – 2.024
Birefringence: +0.002 to +0.059
Color of streak: White,
Absorption spectrum: 691, 689, 662, 660, 653, 621, 615, 589, 562, 537, 516, 484, 460, 433
Fluorescence: Blue: very weak; light orange red and brown: weak, dark yellow

The Zircon zodiac, myth & legend
Zircon is a birthstone for those who are born in December.

Hindu poets wrote of the “Kalpa Tree”, the ultimate gift to the gods, which was a glowing tree covered with gemstone fruit with leaves of zircon.
In the middle ages, zircon was said to aid sleep, bring prosperity, and promote honor and wisdom in its owner.

In Antiquity, as well as in the Middle Ages one believed that the cosmos reflects in the gemstones. The zircon is assigned to planet Pluto. The esoteric movement revived the ancient believe and the gem industry made it another marketing tool to promote certain gems.

The healing powers of gems remain a controversial issue, but are mentioned for centuries by healers, shamans and medicine men. Whether it’s a fact or a placebo effect doesn’t matter, if it helps. The safest approach is to wear the gemstone in skin contact to the troubled part of the body. Zircon is said to be of help for varicose veins, blisters and testicles problems.

-information re-blogged from Gemselect.com

Making My Brother’s Wedding Rings 3: The Wax Carving

The starting blanks of jeweler's wax.
The starting blanks of jeweler’s wax.

Making wax models of the pair of wedding bands I’m working on for my brother’s upcoming wedding this summer is both easy and requires skilled hands.  The wax is like a soft plastic, so it’s durable and can take hard work and tools.  But working in 3-D has never been something I’ve been adept with.

Carving or sculpting something to be later cast in metal requires you to “see” the final shape in the wax.  You have to have a kind of x-ray vision to know what parts of the material you’ll need to remove, and what needs to stay.

Carving begins.
Carving begins.

I started carving the ladies band first, and will model the mens on it.  The whole set is based (as you’ll know if you’d happened on parts 1 & 2 of this series) on my mother’s engagement ring; a beautiful yellow gold solitaire, with a simple band that just has a simple, gentle peaked edge along the top.

Working the peak into the design.

Once the main shape is carved with rough rasps, a finer one is used to smooth out lines and ridges.

Rasping the wax.
Rasping the wax.

Finally (and I’m not quite there yet)  a very fine rasp  followed by rubbing with denim cloth or pantyhose will polish the wax to a lovely finish.  The great thing about casting in wax is that if you finish the wax perfectly and with a lot of care, it requires only minimal cleanup and hand-finishing once the metal version comes out of the casting tank.

The teeny delicate wax model ready for final measurements and finishing.

Jewelry Blog: Adventures in Gold Plating

The finished Gold-plated project.

I’m always happiest when learning something NEW in the jewelry field. This weekend, I worked with a local goldsmith friend who taught me about the deceptively simple process of electro-plating.

I always thought plating involved dipping a piece of metal into liquid gold, or silver, or whatever metal. I learned you are dipping it, but the liquid looks more like water than liquid metal.

Vintage electro-plating machine.
Cleaned sterling silver (dipped in lye), ready for plating.

If I can simplify, the process uses an electro plating machine, or even a 9V battery if you prefer, some wires, and a chemical solution containing suspended gold particles.

Bubbling chemical solution as current passes through.

A charge is run through the solution; commonly cyanide, and the particles are drawn to the charged object; the jewelry that’s being plated. The solution bubbles as the charge passes through and the gold attaches itself to the underlying metal. Some jewelers believe that the best base for electro-plating gold, is sterling silver.

20130422-113648.jpg

The process is quick, simple and produces a good finish. On jewelry such as necklaces or earrings, the finish could last many years. On rings, it could wear off much quicker. But electro-plating allows the hobby silversmith the chance to produce items in gold, that might otherwise be too expensive, or cost-prohibitive to make in solid gold.

20130422-113749.jpg

Gold-plated sterling silver before and after plating.

Making My Brother’s Wedding Rings Part 2: First Steps and What the Heck Does 10 Karat mean?

Sometimes before there can be construction, there is destruction in jewelry making.  Metal must be melted down or in this case, old jewelry must be torn apart.

My brother’s wedding bands are going to be gold, and we’d collected a good amount from various family members, friends and kindly donors who were tired of unwanted baubles cluttering up their jewelry boxes and drawers.  But before we can work with that gold, it has to be verified as gold (as opposed to gold coloured base metal, brass or copper), and all stones and and glue must be taken out.

A bag of collected "old gold".
A bag of collected “old gold”.

So on a chilly Saturday afternoon, I consulted with my goldsmith pal and teacher Trevor to separate the bounty into usable and not usable.

Gold that’s real must be stamped with its karat weight; 10k, 14K, etc.  That number translates into the percentage of gold in the metal.  100% pure gold is just not used for jewelry; it’s way too soft and would bend or break instantly.  It must be alloyed or mixed with other metals to make it sturdy.  Pure gold is often alloyed with nickel, silver, or copper.  As the percentage of pure gold decreases, the strength of the metal increases: so 14k gold will be stronger than 18k.  Fortunately, as the percentage of pure gold  in your alloy decreases, the price of the metal also drops: so 14k will cost less than 18k.

So what do those numbers mean exactly?   “18k” gold is 18/24 or 75% pure gold.   “14k is 14/24” or 58.3% pure.  10k gold is just  41.7% and is the lowest alloy allowed for legal sale  as “gold” in The USA, and it must be marked if it’s to be sold.  Gold made in the USA  can be out by a half of one Karat.  Canadian gold goes by “Plumb Gold Standard” and the percentage of fine gold has to be right on.

In Canada,  if you’re going to mark your jewelry as 18 karat gold, or with any karat or quality mark it must also have  a maker’s trademark (also known as a  “manufacturer’s mark” or hallmark).  BUT.. the law also allows for precious metal jewelry to be without ANY of those marks; which is why sometimes your gold doesn’t SAY it’s gold.  So how will you know for sure?  You can have it tested, or if you no longer care for it, cut into it with a file or saw.

Old gold taken apart.
Old gold BEFORE its taken apart.

So that’s where we were Saturday; carving into some pieces of gold to check that they are the real thing.  We used pliers and tools to remove both cheap glass stones, rubies, and yes, even some diamonds.  Trying to handle tiny diamonds that are probably slimmer than a hair was fun.  But I don’t think we lost a single one!

5 rubies from an old ring of mine, plus a decent sized diamond from another old ring I'll never wear. Those can be used later in something else.
5 rubies from an old ring of mine, plus a decent sized diamond from another old ring I’ll never wear. Those can be used later in something else.

Also in the donated pile were a few chunks of pre-melted gold, and some dental gold.  One was clearly a crown, the other was still attached to the tooth!  Kinda yuckky, especially when Trevor told me the way to get the gold out of the tooth was to smash it up.  Tooth fragments everywhere!  But gold is gold and we’ll need all the little bits to make these rings.

Pre-melted gold chunk plus old rings.
Two gold teeth! A weee bit creepy.

We also made a new decision about how the rings will be made.  My initial plan was to melt the gold and pull it into wire; to basically fabricate them.  But in looking again at the original solitaire, Trevor suggested it would be easier and better to carve them out of wax, and cast them.  So that’s the new plan.

I’ve got some jeweler’s wax ring blanks and will begin carving them by hand.  Jeweler’s wax is basically a soft plastic that can be cut and carved with files.  If you do a good job carving your wax, and making sure it’s smooth and even, it will require only minimal finishing afterwards.

IMG_4730

Jeweler's Wax ring blanks.
Jeweler’s Wax ring blanks.
Sizing the wax before carving.

So that’s where we are now; wax carving is underway.  Stay tuned.

To check out more of my jewelry work click HERE.

The engagement ring I'm making matching bands for.  It belonged to our mother.
The engagement ring I’m making matching bands for. It belonged to our mother.

Rare Pink “Princie Diamond” sells for $39 million

Princie Diamond
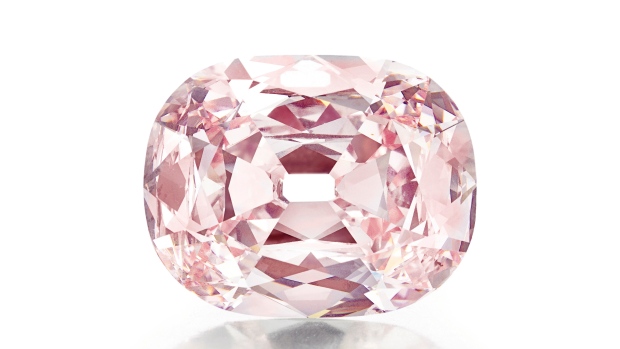
This undated photo provided by Christie’s shows a rare pink diamond, nicknamed the Princie Diamond, which has sold for $39.3 million at auction in New York City. The price for the 34.65-carat diamond that sold to an anonymous buyer at Christie’s on Tuesday, April 16, 2013, was the second-highest ever for a jewel sold at auction. (AP Photo/Christie’s)
The Associated Press
Published Thursday, April 18, 2013 6:46AM EDT

NEW YORK — A rare pink diamond once owned by Indian royalty has sold for $39.3 million at auction in New York City.

The price for the 34.65-carat diamond that sold at Christie’s on Tuesday was the second-highest ever for a jewel sold at auction. The seller and buyer were anonymous.

The gem nicknamed the Princie Diamond was discovered 300 years ago in the Golconda mines in India.

It once belonged to the Nizam of Hyderabad, an Indian prince.

In 1960, the diamond was purchased at auction by the London branch of the jeweler Van Cleef & Arpels.

Its name was bestowed at a party at the firm’s Paris store. It was called Princie in honour of the 14-year-old prince of Baroda, who attended the party with his mother, Maharani Sita Devi.

Read more: http://www.ctvnews.ca/entertainment/rare-pink-princie-diamond-sells-for-us-39-3-million-at-new-york-auction-1.1243004#ixzz2QpqFCPSV

Reblog/repost via CTV News/AP

Jewelry Blog: Antler Necklace – From Inspiration to Reality!

I saw lovely necklaces that inspired me recently. The first was this stunner worn by actress Kate Hudson. A beautiful gold horn or claw on a heavy chain.

Wish I knew who to give credit for this glam jewelry to.  Designer unknown.
Wish I knew who to give credit for this glam jewelry to. Designer unknown.

The second was worn by my friend Nancy T; a cool piece of horn, suspended from what I call a “bicycle link” chain.

The process was daunting; first to find the appropriate horn, claw, spike, tooth or… antler to form the centrepiece. Etsy was able to help me out there. In case you’ve never checked out etsy.com, a quick aside; they have beautiful jewelry and handmade crafts but also really cool supplies for your crafting creative needs. (Check out my etsy website for a handy preview)

I found a wonderful supplier (Fireforged )who gathers “found” antler that’s been shed by deer etc. He was able to cut and sand some pieces to size for me, including a nice 10 cm chunk that I thought would be pretty bold.

antler
Beautiful antler from Fireforged : http://fireforged.org/
Photo: Rodney
antler2
Beautiful antler from Fireforged : http://fireforged.org/
Photo: Rodney

Next– to make a bezel, or the part that grips the antler. I formed a piece of silver around the base, soldered it, then added a cap, and some decorative gallery wire along its side to keep it interesting.

20130328-110108.jpg

Then it was on to the chain. The bicycle chain is a pretty simple beast; snip pieces of wire (mine were about 1.5” each), ball just one end with a jeweler’s torch.

20130328-110142.jpg

Flatten it with a hammer, then drill a hole in it and insert the link. Slip another piece of balled wire through the loop, then ball its end so it’s linked and locked in. Bend one balled end by about 90 degrees and it will basically curve itself. Keep going until the chain is as long as you need.

20130328-110126.jpg

20130328-110207.jpg

A simple s-hook is keeping it together for now.

20130328-110048.jpg

I also had visions of oxidizing the necklace to give it a very vintage feel, like Nancy’s necklace, but it was so pretty and shiny, I left it as is. Might have to make another since I have a couple more pieces of antler… I can give that oxidized look a try.

20130328-110035.jpg 20130328-110020.jpg 20130328-105958.jpg 20130328-105933.jpg